Automating Expo App Builds and Submissions with GitLab CI/CD
By Ward Pieters on
Intro
Expo is a great tool for building React Native apps, and GitLab CI/CD is an excellent way to automate the process of building and submitting those apps. In this blog post, we'll walk through the steps necessary to set up a GitLab CI/CD pipeline for building and submitting an Expo React Native app, using semantic-release for versioning and Expo EAS for building and publishing.
Prerequisites
A basic understanding of GitLab CI/CD and Expo is assumed. If you are not familiar with these tools, you can learn more about them by reading the GitLab CI/CD documentation and the Expo documentation. In case you are using a self-hosted GitLab instance, you will need to make sure that you have a GitLab Runner installed and configured. For more information on how to do this, see the GitLab Runner documentation.
Setting up semantic-release
Semantic-release is a tool that automates the process of versioning and releasing code, using commit messages to determine the appropriate version number. To use semantic-release with GitLab CI/CD, we first need to install the necessary packages and configure them appropriately.
Install semantic-release and plugins
Use either Yarn or NPM to install the required packages.
yarn add -D semantic-release semantic-release-expo @semantic-release/changelog @semantic-release/commit-analyzer @semantic-release/git @semantic-release/gitlab @semantic-release/npm @semantic-release/release-notes-generator
npm install --save-dev semantic-release semantic-release-expo @semantic-release/changelog @semantic-release/commit-analyzer @semantic-release/git @semantic-release/gitlab @semantic-release/npm @semantic-release/release-notes-generator
After installing above packages, we need to make sure the private attribute in the package.json file is set to true. This will prevent the package from being published to the npm registry. Also, set the repository field to the SSH URL of your GitLab repository. You can find this on the GitLab project page under the Clone button.
{
  "name": "my-app",
  "private": true,
  "repository": "git@<YOUR_GITLAB_DOMAIN>:ward/my-app.git"
}
Configure semantic-release
Next, we need to configure semantic-release. We can do this by creating a file called .releaserc.yml in the root of our project. This file will contain the configuration for semantic-release. The configuration below is a good starting point, but you can customize it to your needs. For more information on the configuration options, see the semantic-release documentation.
Notice: you should replace YOUR_GITLAB_DOMAIN with your own GitLab domain in the configuration below. Or replace it with gitlab.com if you are using GitLab.com.
plugins:
  - "@semantic-release/commit-analyzer"
  - "@semantic-release/release-notes-generator"
  - "@semantic-release/npm"
  - - "semantic-release-expo"
    - versions:
        android: "${increment}"
        ios: "${increment}"
  - - "@semantic-release/changelog"
    - changelogFile: CHANGELOG.md
  - - "@semantic-release/git"
    - assets:
        - CHANGELOG.md
        - package.json
        - package-lock.json
        - app.json
      message: "chore(release): ${nextRelease.version}\n\n${nextRelease.notes}"
  - - "@semantic-release/gitlab"
    - gitlabUrl: https://<YOUR_GITLAB_DOMAIN>
Setting up GitLab CI/CD
Now that we have our dependencies and configuration files in place, we can create our GitLab repository and set up our CI/CD pipeline. This involves creating a .gitlab-ci.yml file that specifies the stages of our pipeline (e.g. building the app, publishing the app, etc.) and the commands to run at each stage. We'll also need to set up some environment variables in GitLab to store sensitive information like our Expo credentials.
Configure GitLab environment variables
SSH key
First, we need to configure the SSH key that will have write access to our GitLab repository. This is necessary for semantic-release to be able to commit the new version to the default branch. To do this, we need to create a new SSH key and add it to our GitLab repository. Use the command below to generate a new SSH key, you can replace my-app with the name of your app or any other name you like.
ssh-keygen -f ~/.ssh/my-app -t rsa -b 4096 -C my-app
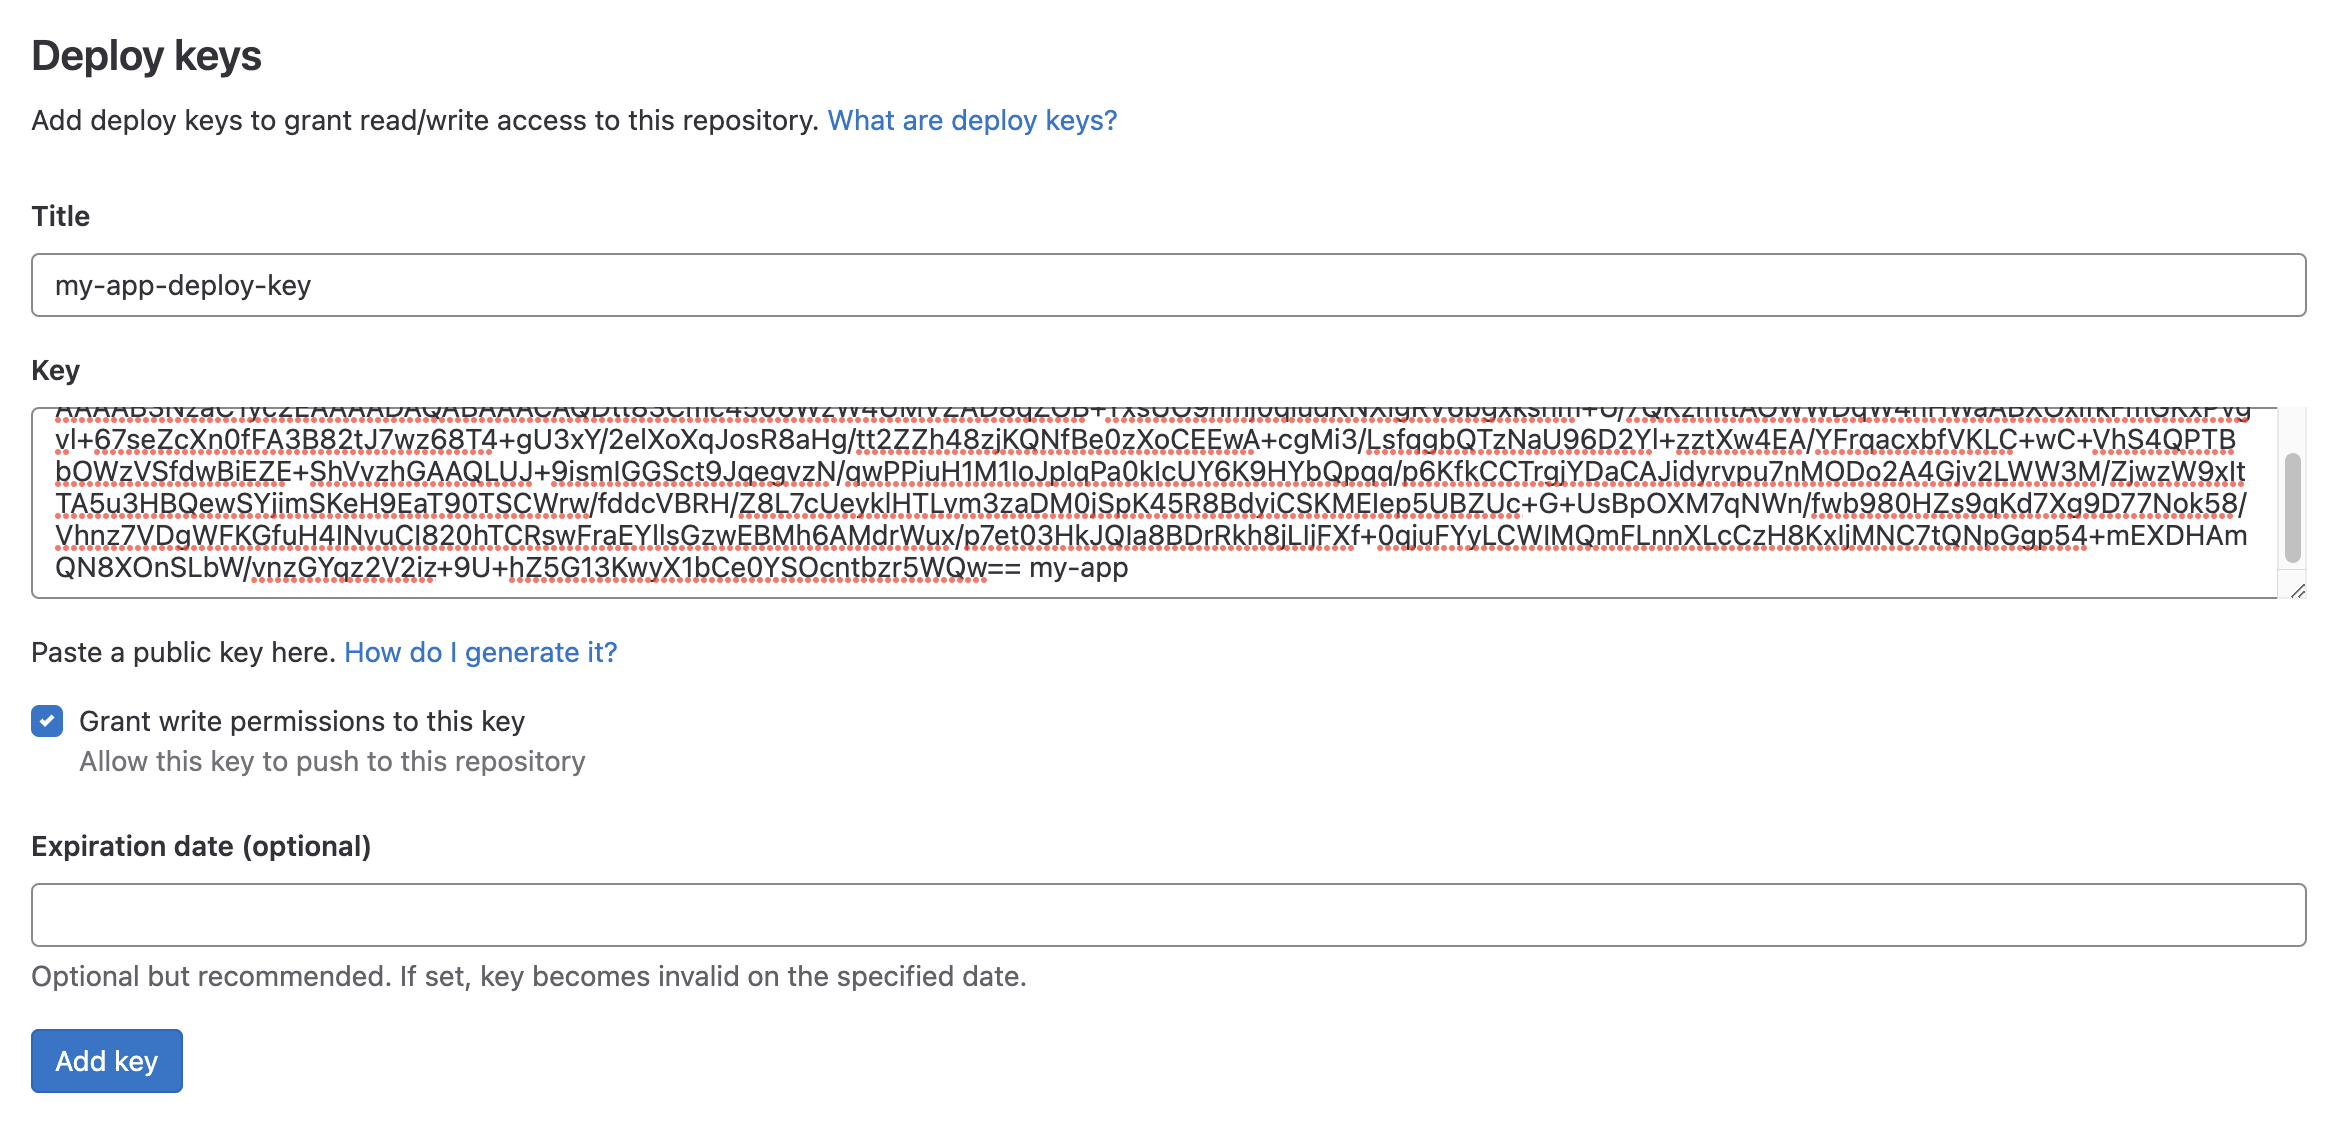
Once the keypair has been generated, copy the contents of the public key (e.g. ~/.ssh/my-app.pub) and add it to your GitLab Project Deploy Keys by following the instructions from the GitLab Docs. Make sure the key has write access, as shown in the screenshot below.
Next, you will need to add the private key (e.g. ~/.ssh/my-app) to your GitLab Project Environment Variables by following the instructions from the GitLab Docs. Make sure the variable name is set to CI_SSH_KEY, as shown in the screenshot below.
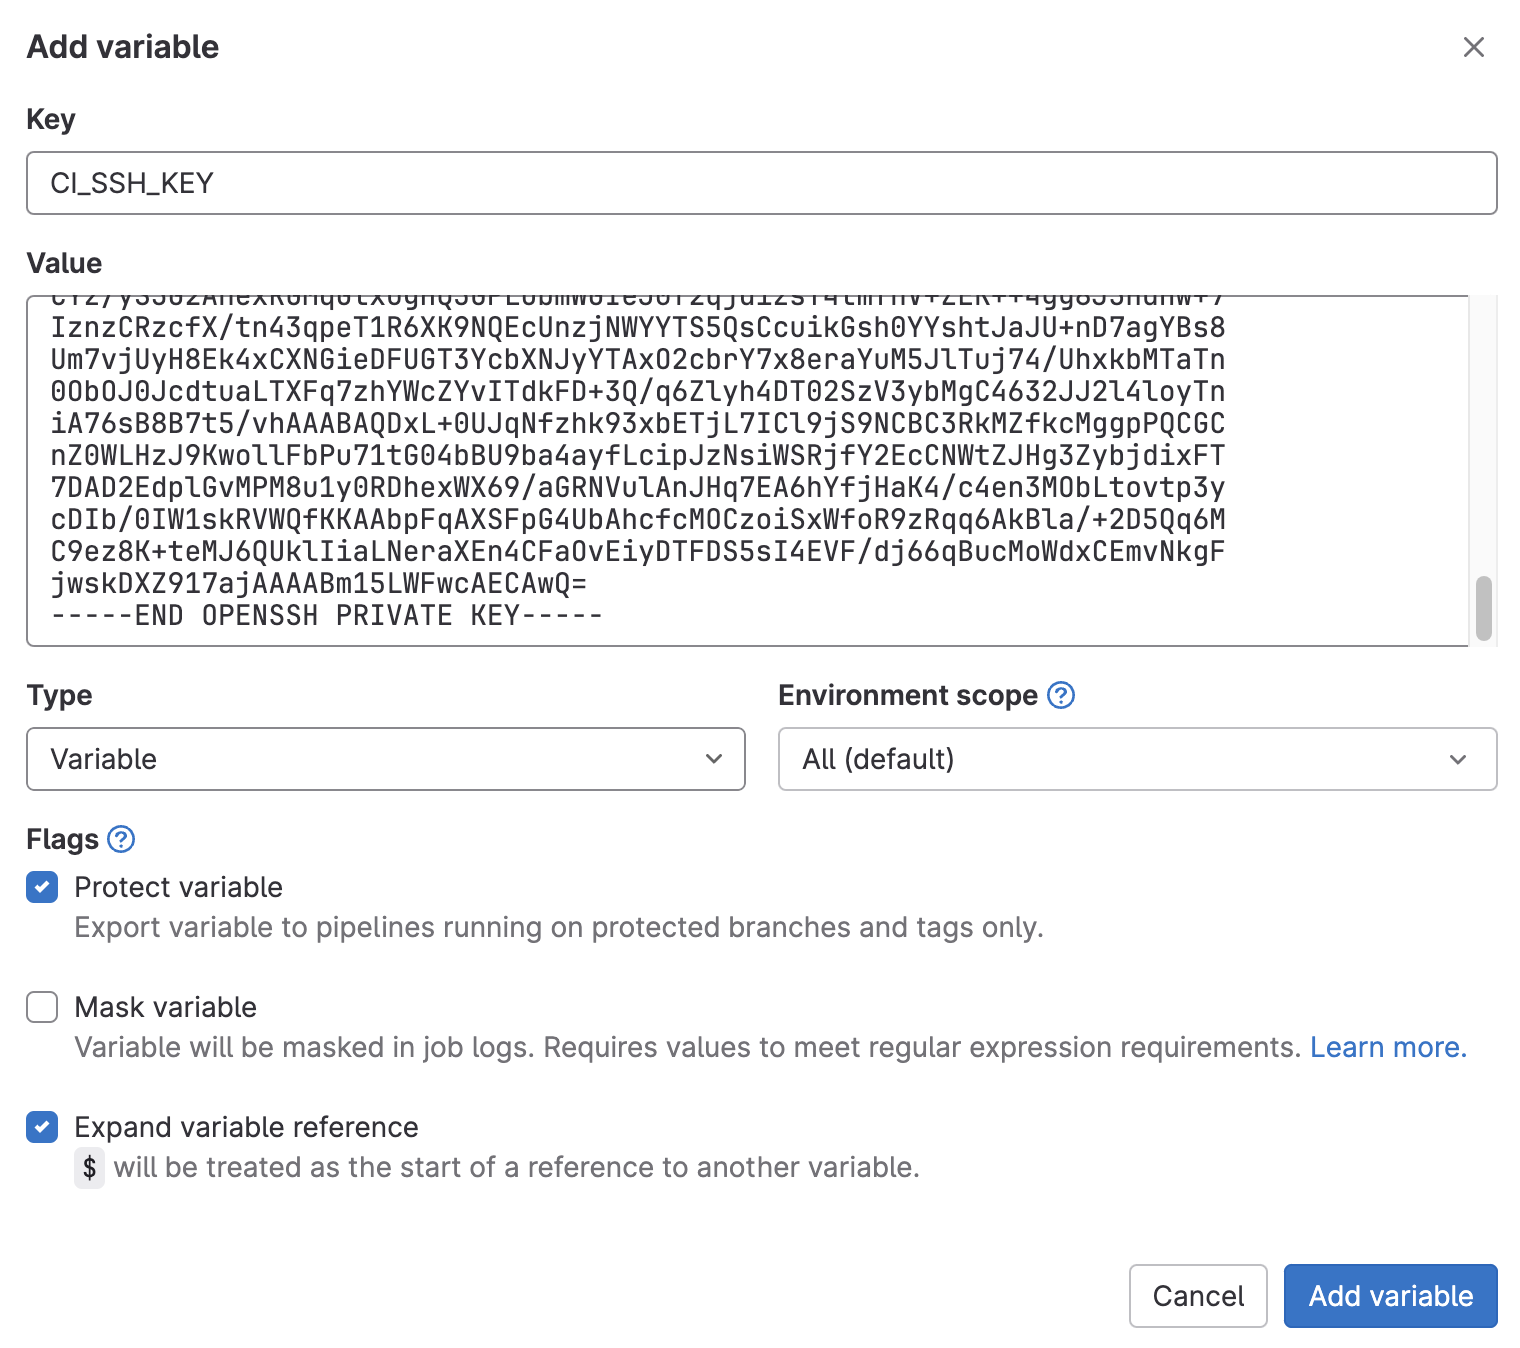 Note: this private key is used for demonstration purposes only and is not in use.
GitLab token
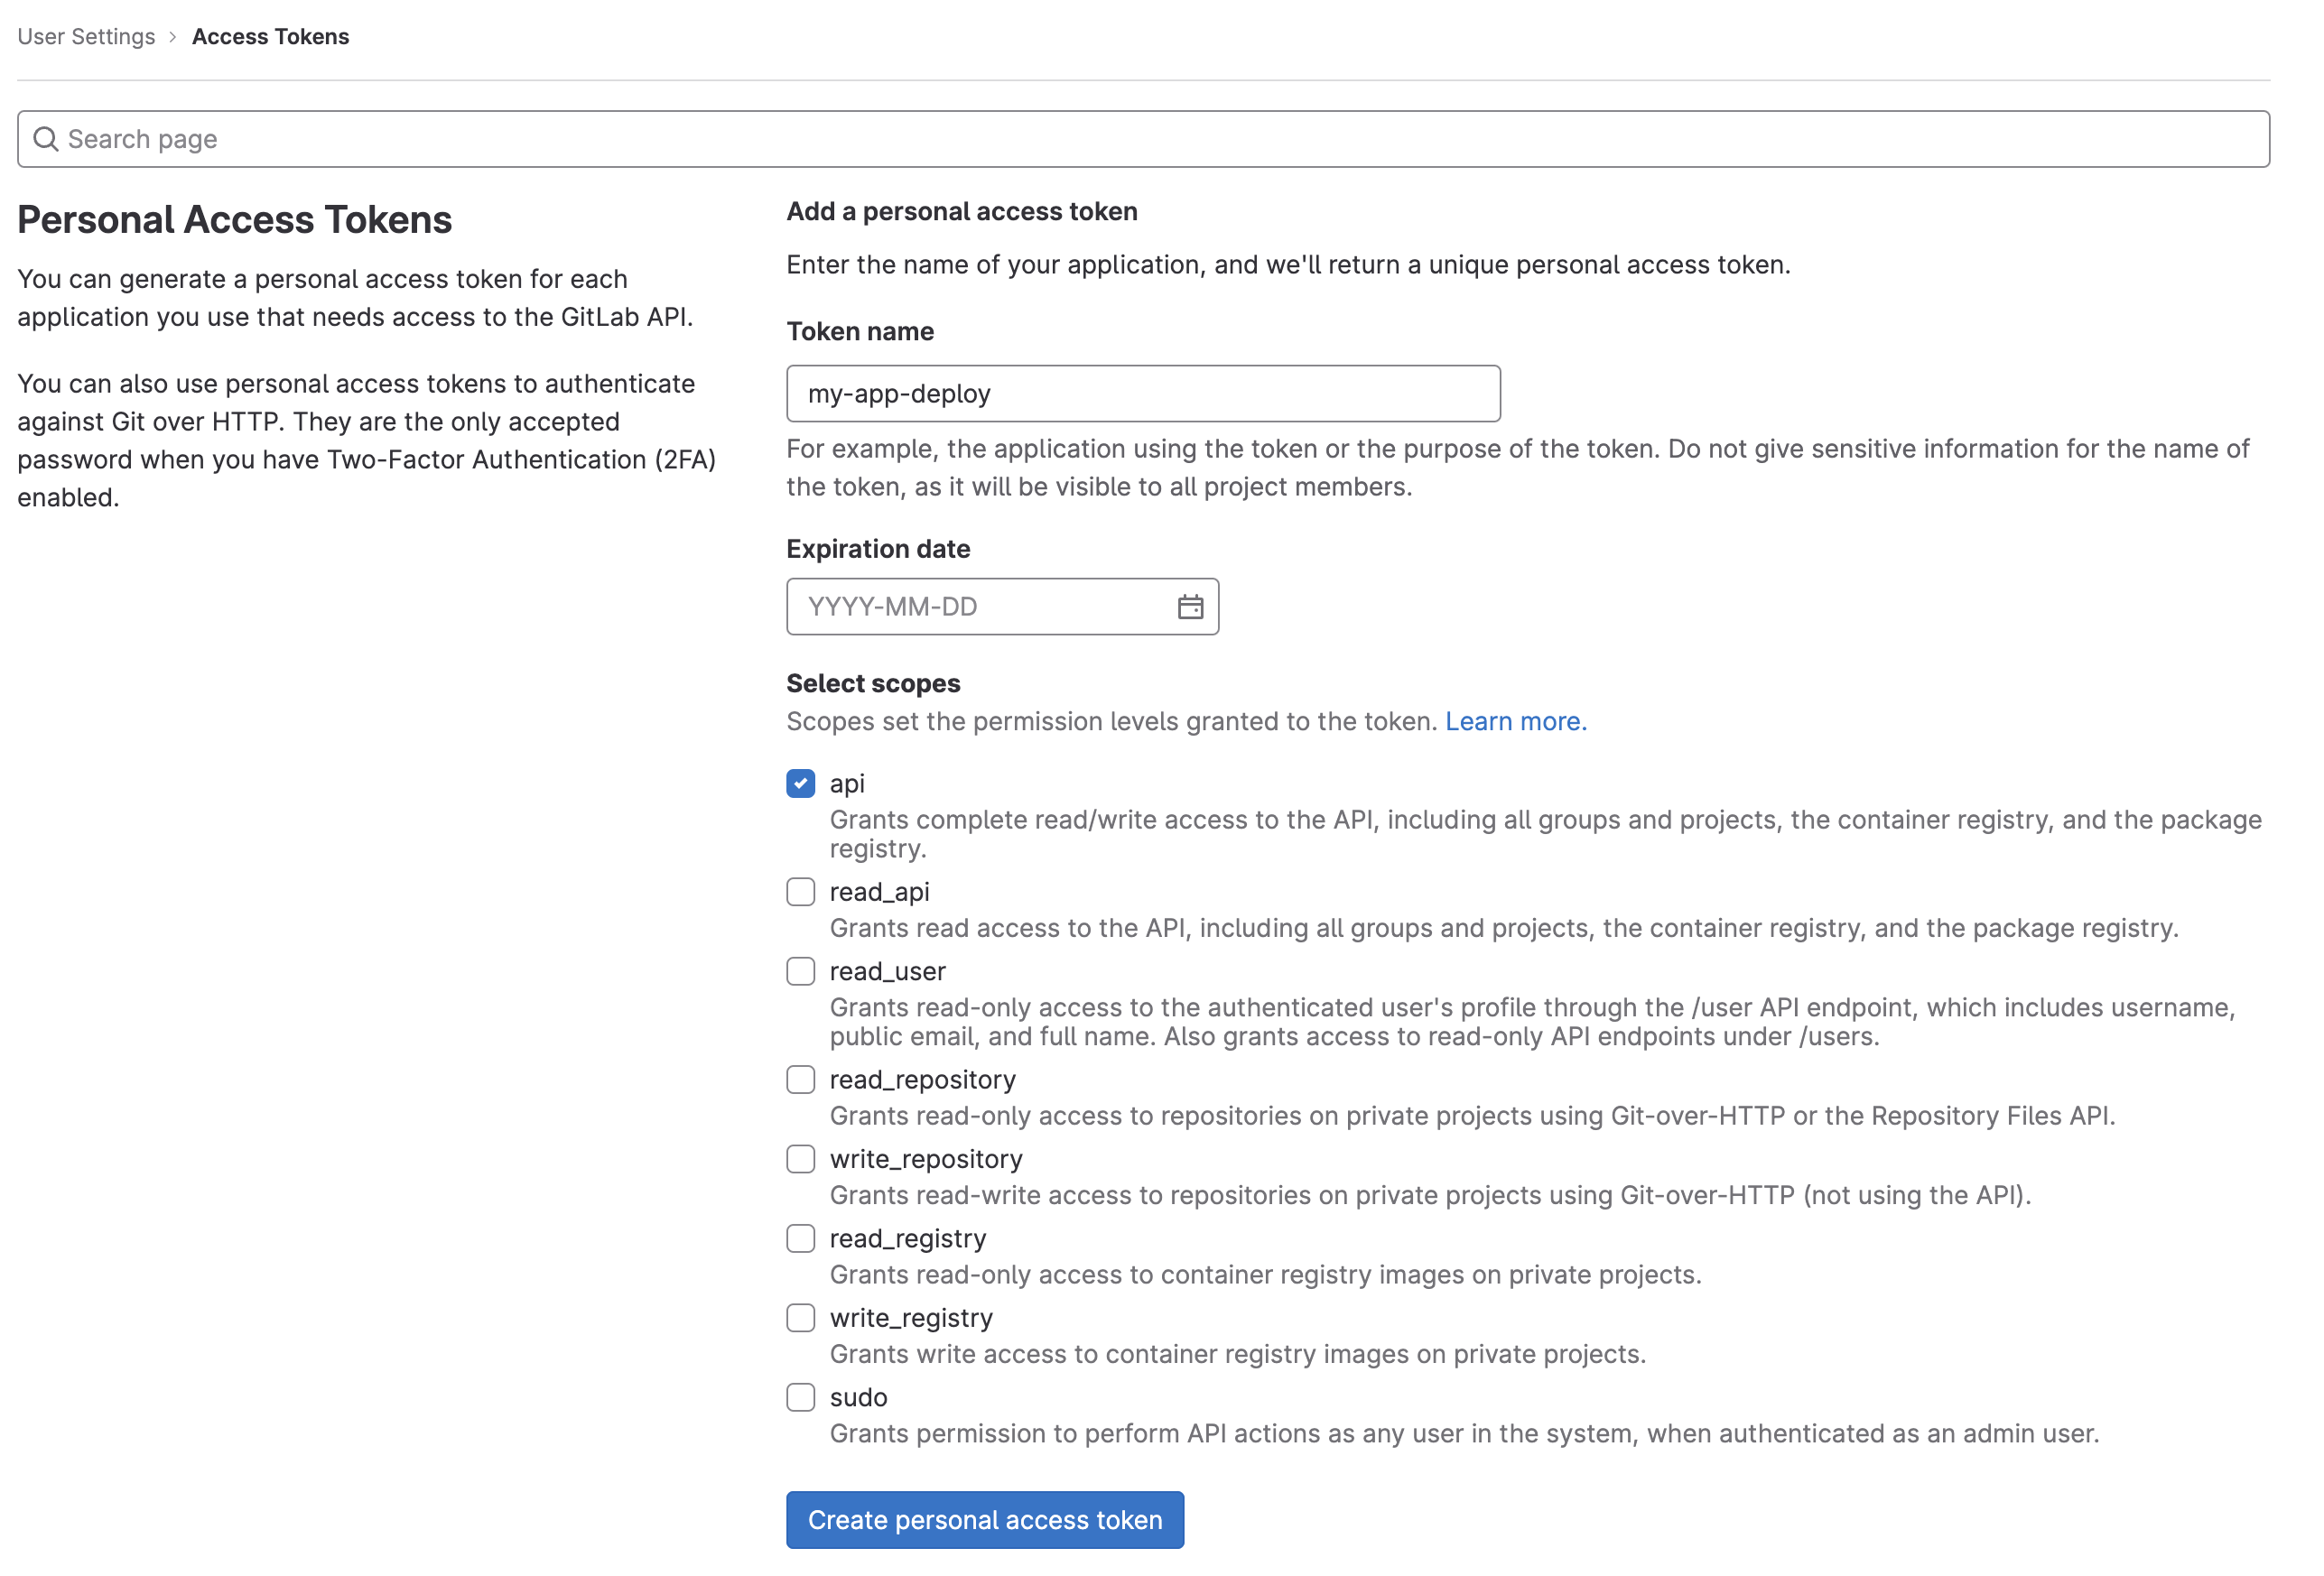
The @semantic-release/gitlab package requires a GitLab token to be able to create releases. To create a new personal access token, go to your GitLab Preferences and click on Access Tokens. Then fill in the form as shown in the screenshot below and click on 'Create personal access token'.
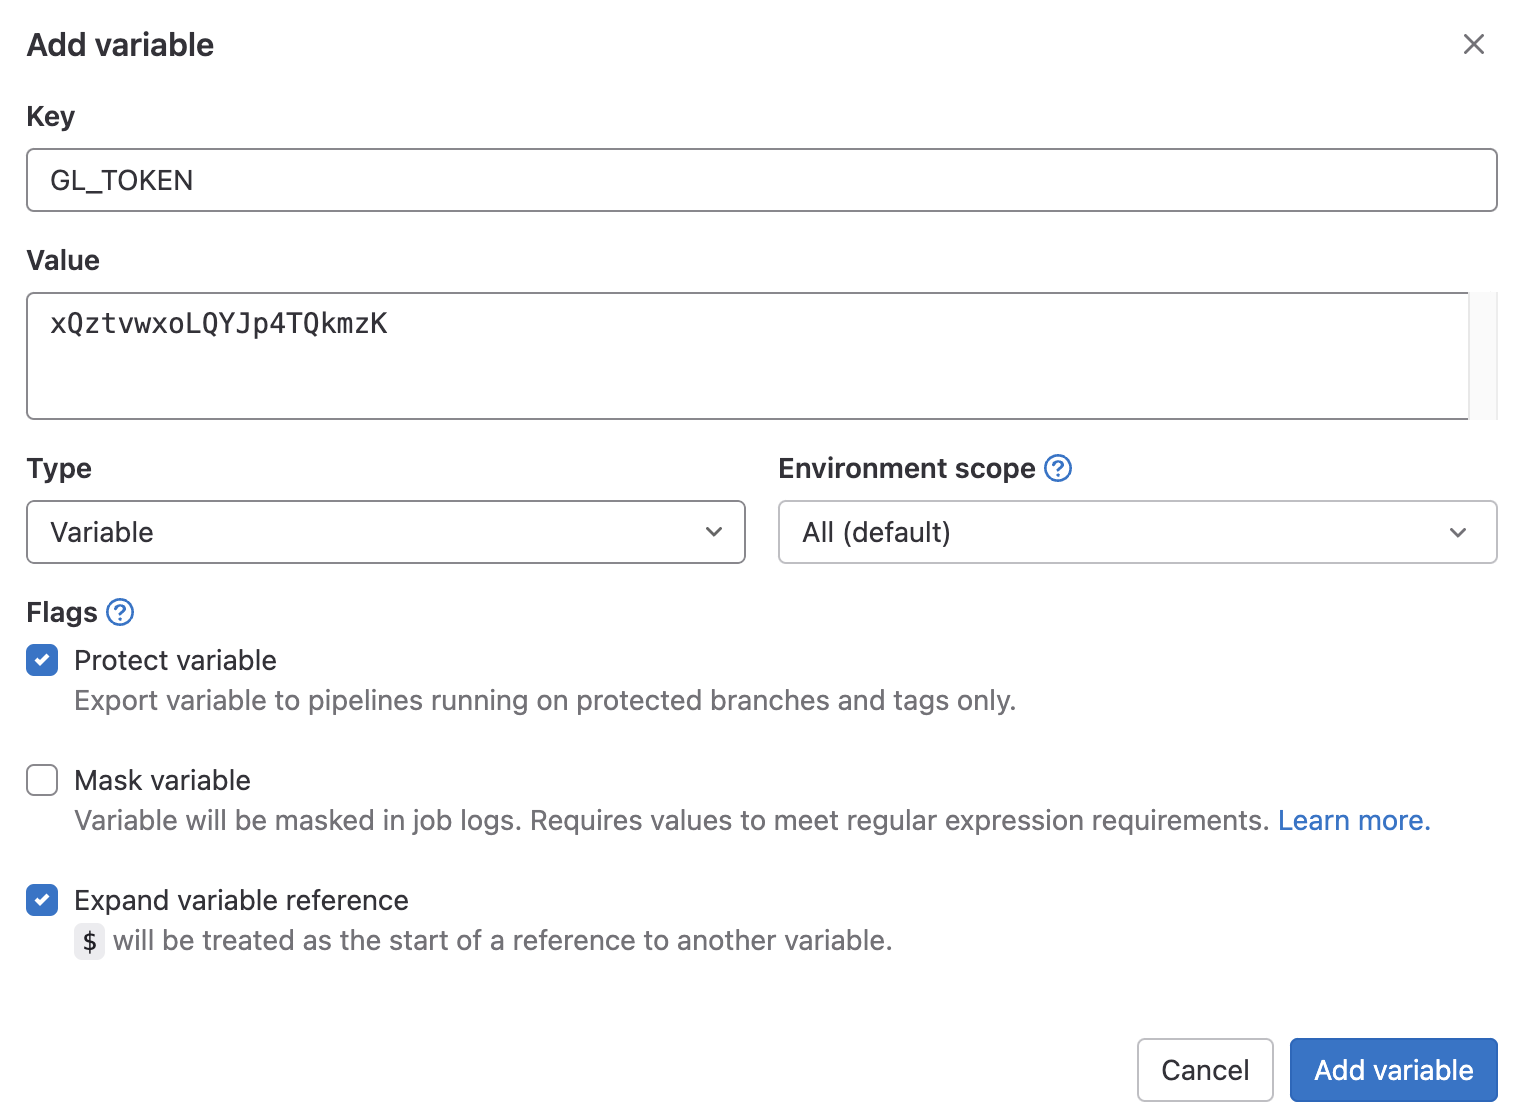
Now, add the token to your GitLab Project Environment Variables by following the instructions from the GitLab Docs. Make sure the variable name is set to GL_TOKEN, as shown in the screenshot below.
Expo credentials
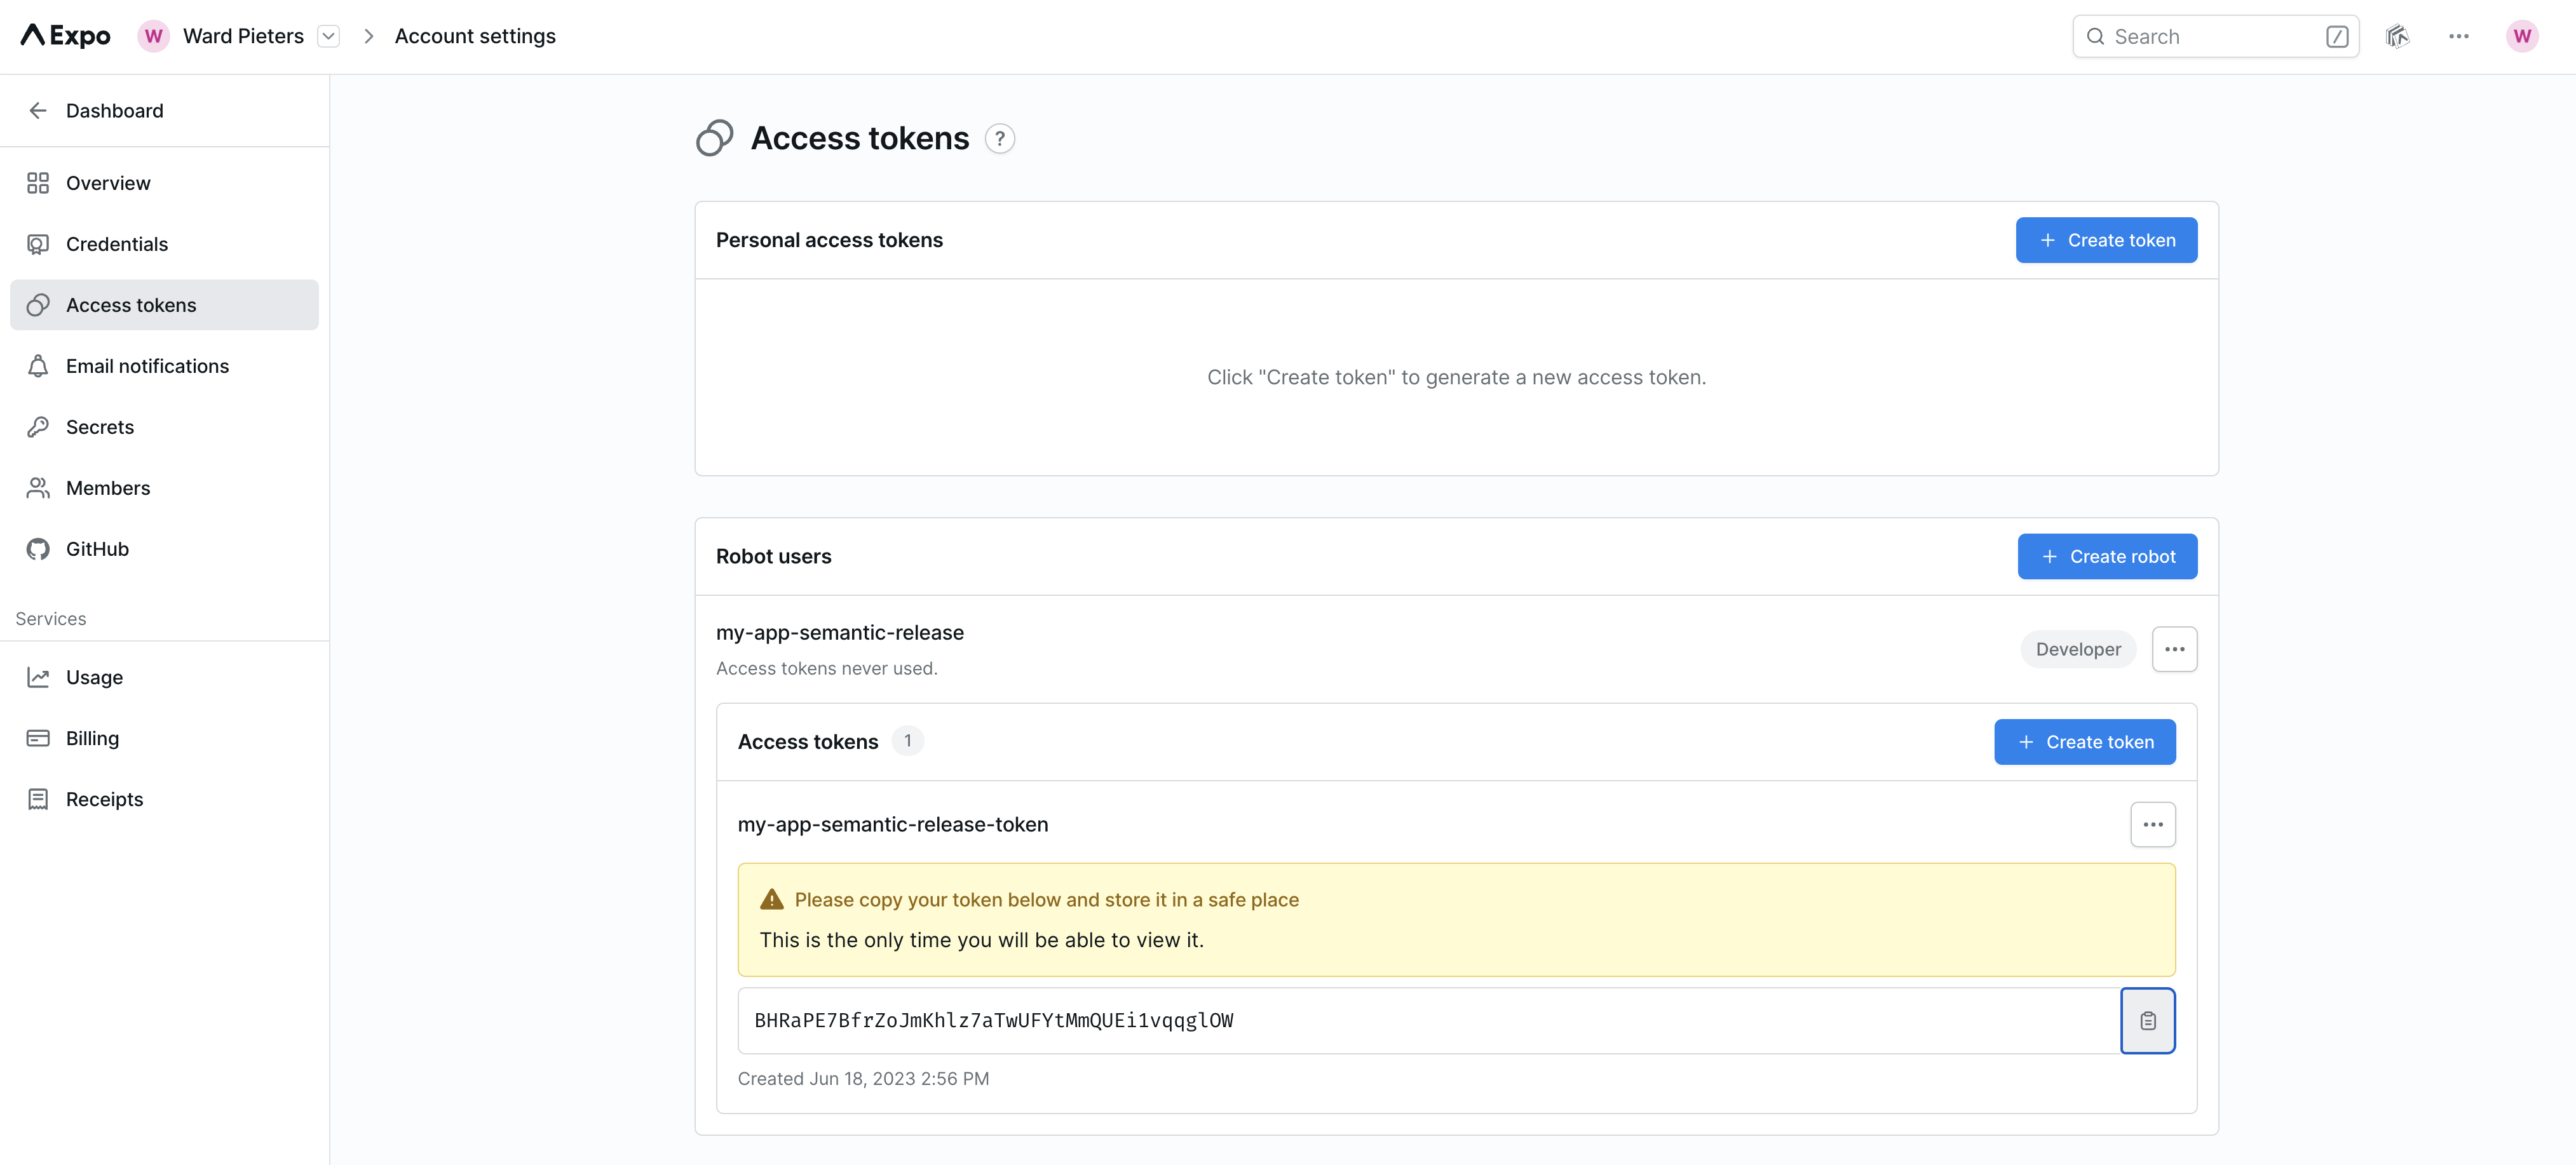
To build your app with Expo EAS, you will need to add an Expo token to your GitLab Project Environment Variables. You can generate one by going to the Access Tokens section of your Account Settings. As shown on the screenshot below, you will first need to create a Robot user and then generate a new token for that account.
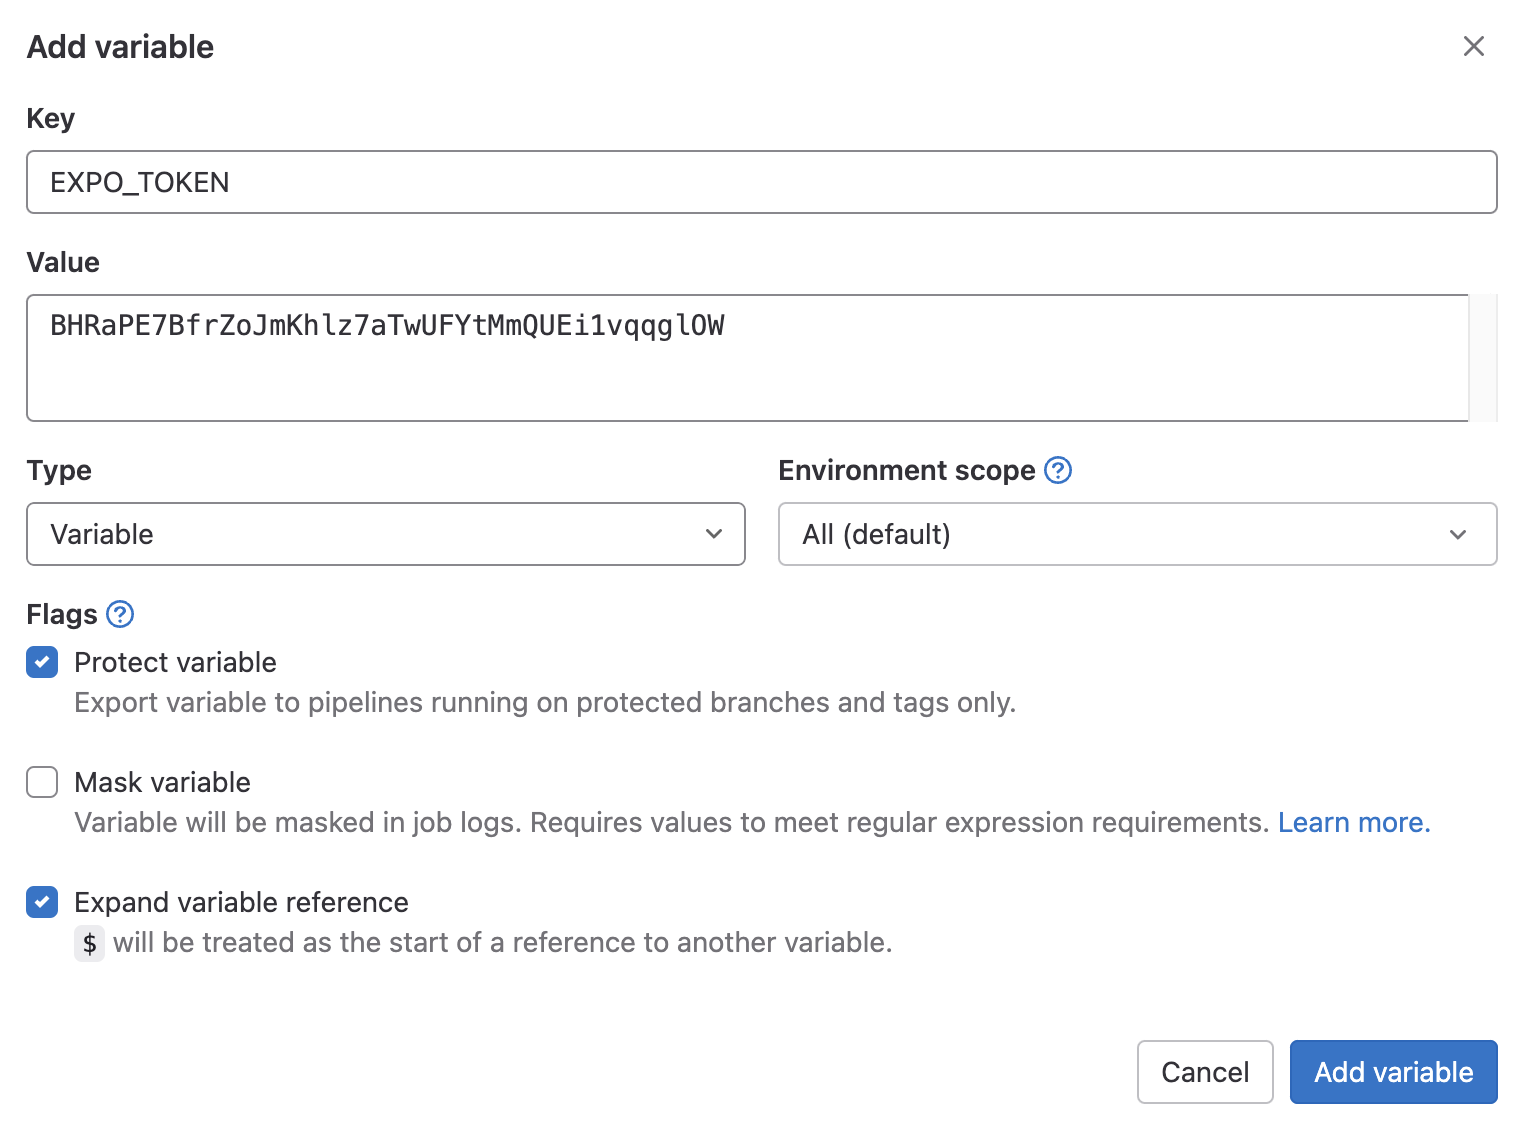
After you have generated the token, add it to your GitLab Project Environment Variables by following the instructions from the GitLab Docs. Make sure the variable name is set to EXPO_TOKEN, as shown in the screenshot below.
Now open the app.json file in the root of project and add the owner property, set the value to your Expo username. This is necessary for Expo EAS to be able to build your app.
{
  "expo": {
    "name": "my-app",
    "slug": "my-app",
    "owner": "YOUR_USERNAME",
    ...
  }
}
Next, run the eas init and eas build -p all command to initialize your Expo project. You will be asked to provide some information, such as your Apple Developer account details. After completing this, a new project on Expo is created and also a eas.json file in the root of your project. This file contains the configuration for Expo EAS. You can customize this file to your needs, but the default configuration should be fine for most projects.
Configure GitLab CI/CD pipeline
In the root of the project, create a file called .gitlab-ci.yml. This file will contain the configuration for our GitLab CI/CD pipeline. The configuration below is a good starting point, but you can customize it to your needs. For more information on the configuration options, see the GitLab CI/CD documentation.
The configuration may seem overwhelming at first, but it is straightforward. The first thing to notice is that we have two stages: test and release. The test stage is used to run tests and other checks on the code and will run on pull requests. The release stage is used to build and publish the app. The release stage is only run when a commit is pushed to the default branch (e.g. master) and the commit author is not semantic-release-bot. This is to prevent the pipeline from running when semantic-release commits a new version to the default branch, and cause an infinite loop.
stages:
  - test
  - release

before_script:
  - npm install -g expo-cli
  - npm install

node:16:
  image: node:16-alpine
  stage: test
  allow_failure: true
  only:
    - merge_requests
  script:
    - npx tsc
    - expo-cli doctor

bump-version:
  image: node:18-alpine
  stage: release
  rules:
    - if: ($CI_COMMIT_BRANCH == $CI_DEFAULT_BRANCH && $CI_COMMIT_AUTHOR !~ /semantic-release-bot.*/)
  script:
    - "which ssh-agent || ( apk --update add openssh-client git )"
    - mkdir -p ~/.ssh
    - eval $(ssh-agent -s)
    - '[[ -f /.dockerenv ]] && echo -e "Host *\n\tStrictHostKeyChecking no\n\n" > ~/.ssh/config'
    - ssh-add <(echo "$CI_SSH_KEY")
    - npx semantic-release

publish:
  image: node:16-alpine
  stage: release
  environment:
    name: production
  only:
    refs:
      - tags
    variables:
      - $CI_COMMIT_TAG =~ /^v.*$/
  before_script:
    - apk --update add git
    - npm install -g expo-cli eas-cli
    - npm install
  script:
    - eas build --platform all --profile production --non-interactive --auto-submit
Profit!
That's it! You can now commit and push your code to GitLab (git add . && git commit -m "feat(ci): add semantic release" && git push).
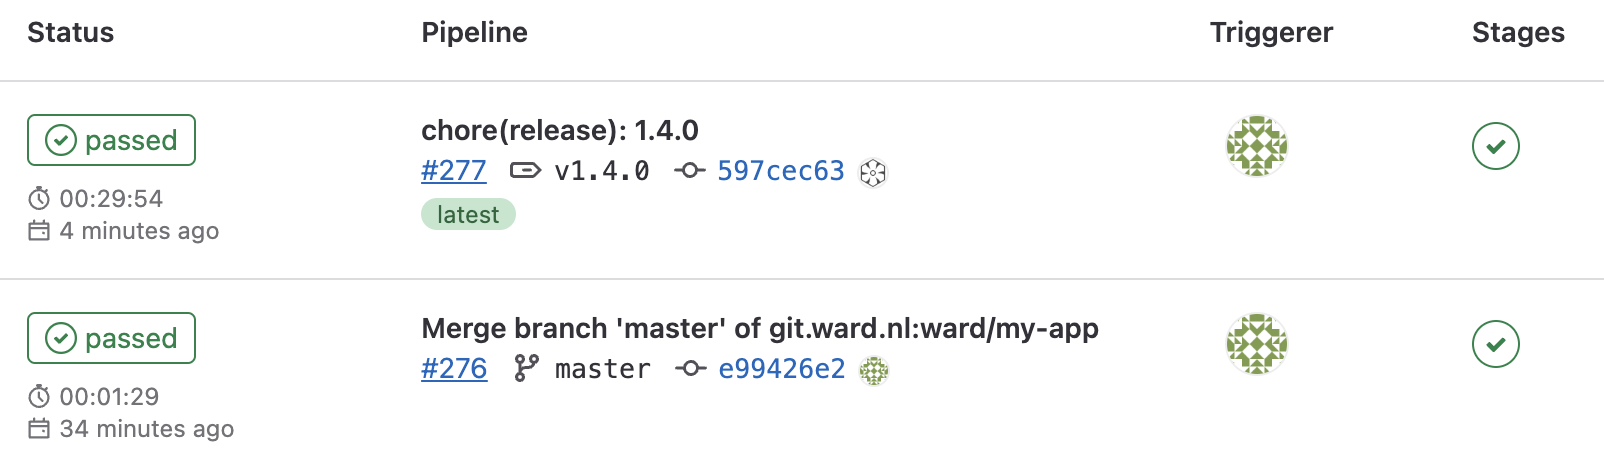
With the GitLab repository and pipelines set up, you are ready to start building and publishing apps automatically. You can simply push code changes to GitLab, and the pipeline will take care of the rest - building the app and publishing it to the appropriate release channel!
You can see the pipeline in action by going to the CI/CD > Pipelines page in your GitLab project.
Problems?
This post has been written with the outmost care, but if you find any mistakes or have any suggestions, please let me know.
If you encounter any problems, check all the steps again and make sure you have followed them correctly. Setting up the pipeline involves multiple steps, so it's important to double-check and ensure that each step is followed correctly.